Studio Adorkable is full of some of the cutest planner supplies I have seen! The artist, Lacey, not only is any amazing artist, but also does a great job of adding action and feeling into her characters! Check out my PR team haul to see what all Studio Adorkable has to offer!
Pick up a set from your favorite show or movie in the Studio Adorkable shop. Use the code Meryisadorkable to get 15% off your order (excludes custom work).
I am part of the Studio Adorkable PR team for this quarter and received this as part of my involvement with the team, but all thoughts and opinions are my own.
**Please note that while I did show how boots could be styled with Poppyclips, I spoke with the lovely people at Poppyclips after and they are not recommended for boots or shoes. They do have an awesome product called BootClips that are designed for boots and have a much stronger magnet. You can purchase those here: https://www.poppyclips.com/poppyclips-for-boots They are so very cute and I’m looking forward to adding them to my capsule wardrobe soon!**
I’ve been working to simplify my wardrobe since before my little girl was born. After I became a mom, I realized that I had even less space, time, and energy for upkeep and styling of my clothing and began focusing even more on creating a capsule wardrobe for myself. For me, a capsule wardrobe is full of pieces that can mix and match to create different looks and/or pieces that I am just totally in love with. It’s still a work in progress and I’m always looking for ways to add new looks to my outfits (particularly if they are inexpensive and don’t take up a lot of space).
Enter Poppyclips! Poppyclips are beautifully crafted fabric accents with strong magnets that hold them onto place on your clothing. I was so impressed with the quality of my Poppyclips and the strength of the magnets. My Poppyclips weren’t going anywhere!
These adorable little accessories add so many possibilities within a capsule wardrobe. You can add them to scarves, sleeves, pants, and even boots! Check out my video above to see how I changed one outfit into four extra looks with just one pair of Poppyclips!
Ready to expand your own wardrobe with Poppyclips? You can purchase your own pair of Poppyclips on the Poppyclips website.
Disclosure: Poppyclips sent me this set of Poppyclips in exchange for a review. All thoughts and opinions expressed in this video and post are my own.
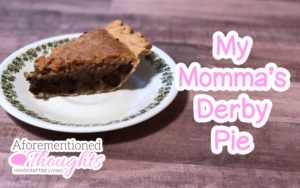
This video is based on a post from one of my much older blogs that you can read below. Since this post was originally written, I’ve made this pie many times. A true testament to just how easy this recipe is, even for a novice cook like myself!
I’m not a natural cook. While I wish I were, I guess we all have to learn somewhere. I’m slowly learning to make some of my favorites from my mom’s recipes. This past week I gave my favorite pie – Derby Pie – a shot!
It turned out great! This is an easy pie to make, even by my standards. You basically mix everything and pour it into the pie shell. In the oven, it (almost magically) turns into a beautiful pie!
It’s definitely not a healthy pie or anything like that, but it is so good!
It was a year ago this week that we went to Disney for the first time as a family. My uncle planned a group trip that we joined in on and, while I was very nervous about taking a 17 month old to Disney, it was a wonderful trip!
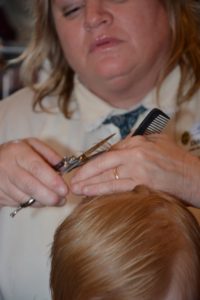
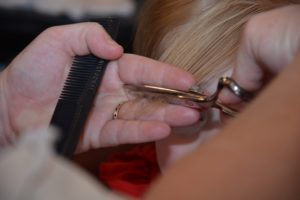
I was talking with a friend who is a Disney expert before we left and she asked if we were going to get our little girl’s haircut while we were there. I believe my reaction was something “At Disney?! Huh??” She explained that Disney had a barber shop on Main Street where haircuts actually happened and that you could get a kid’s first haircut there. I didn’t have plans to get our little one’s haircut at that point, but days later the thought was still spinning in my head. I’m a sucker for a memorable moment with my little one and this seemed like an awesome one.
After chatting with my hubby and the others that we were traveling with (who were all so sweet and said they would be excited to watch her get her haircut also), I called and scheduled a first haircut appointment for my little gal on the day we had planned to be in the Magic Kingdom. I was also informed that since we had the Disney PhotoPass as part of our vacation, a professional photographer would come to the barber shop if we asked and take pictures of her haircut. I was so excited that we were going to have professional photos of her first haircut and that we could focus fully on enjoying the experience without having to catch the photos ourselves!
Naps didn’t go as hoped (but did go as expected) on our trip and by the third day when we were headed to the Magic Kingdom, I was really unsure how the haircut was going to go. Little gal wasn’t cranky, but wasn’t having as happy of a morning as we would have hoped. About an hour before her appointment, she fell asleep in her stroller, which was both a happy time but also caused me apprehension because we would have to wake her up for her appointment. We woke her up right when they called us in and she was still in a bit of a daze when we sat her in the booster seat. The wonderful lady who cut her hair, Diane, got to work right away, giving me a toy and covering her in Mickey stickers. Our little gal lit up at the stickers and was in a pleasant mood throughout the entire haircut. Diane did a great job and I was so happy that her first haircut was a positive experience for us all and that the photographer did a great job capturing it for us.
In addition to the haircut, we got a locket of her hair to take home, plenty of pixie dust, a certificate, and a “first haircut” set of mouse ears. So adorable! If you’re on the fence about scheduling a first haircut while you’re at Disney, it’s definitely something you should go for! Such a sweet and memorable time. Worth the small financial and time investment for sure!
Here are some of the things I really loved using last month!
Noosa Yoghurt – We got a sample of this at a local grocery store and I fell in love. I’m super picky about my yogurt, but Noosa is a sweet and creamy yogurt, unlike any I’ve tried before. I’ve only tried about half of the flavors so far, but I’m a big fan!
Yeti Rambler – My sweet hubby got this for me as a birthday gift last year and I really love using it! It feels great to use – the outside doesn’t get cold or sweaty – and keeps drinks cold for a very long time – I’ve had it keep ice in my cup overnight! I love how cold drinks get in my Yeti. Definitely helps me keep drinking more water!
Vintage Pewter Oak Pergo Outlast Laminate Floors– We recently had some of our flooring changed from carpet to Pergo’s laminate flooring. I love the look and feel our new floors! Makes our home feel so much more luxurious than it did before!
Refuse to Choose by Barbara Sher– I found this book after falling down the internet rabbit hole searching for information on being a multipotentialite. What I really love about this book is how Barbara gives really actionable advice of having multiple interests and passions, something I’ve never really been able to find elsewhere. I am finally starting to feel more comfortable knowing that God made me with many different interests and that I shouldn’t try to fight that in my life.
Smashmallow Marshmallows – I picked these up on a whim during a recent shopping trip (I’ve tried the Root Beer Float flavor). These marshmallow treats are really tasty and a little bit goes a long way to curb my sweet treat cravings.
What were some of your favorites from the last month? Have you tried any of my favorites? Let me know in the comments below!
This toddler lift and find game offers a way to recycle wipes containers while providing a fun and educational game for your little one. The only real challenge with this project is peeling off the wipes lids, but once that effort is over the rest is easy peasy. I used one of the free printables of shapes for this game, but I love that I can create my own games as well based on what we learning. I’m looking forward to using this game and having it grow with us!
Pin: Toddler Lift and Find Game
Project Time: 20 minutes
Project Cost: Less than $1
Pin it or forget it? Pin it!
Since our nieces and nephews became teenagers, we’ve opted to give them cash as gifts so that they can shop for the items they want. While I’m not against putting money in a card as a gift, it’s a lot more fun to give money in a creative way so every Christmas we try to think of a new way to gift the money. Our nieces and nephews always seem to enjoy seeing what we’ve planned for the year as well.
This year, I grabbed some holiday Pez dispensers from the craft store. I rolled the money as tightly as possible and wrapped it in a plastic sandwich bag (so that they could still use the dispensers for candy later without the ick of money germs). Simple and sweet, but fun!
I have second time failure syndrome when it comes to cooking. More often than not, the first time I make a recipe its great. Then, for some reason that I cannot figure out, the second time that I try to make the recipe something goes wrong. I burn it, it tastes funny – something will go wrong. However this recipe is one that I think has made it past the second time. It is one of the few I feel like I can make with a bit of confidence at this point.
My mom shared this crock pot recipe to me several years ago but I never got around to trying it other than at her house when she made it. She mentioned it again after Mudpie came and I decided to give it a try. It’s quickly become one of my favorites. Prep is so easy that when baby girl was tiny I did it all she was still sleeping in the morning. She slept in our living room which is adjacent to the kitchen so this was no small feat. The ingredients are perfect pantry staples that can be used for other dishes if I decide to. This also means that I usually have the ingredients on hand. And, of course, it’s a lovely crock pot recipe which means I don’t have to check on it too often. There’s nothing pretty to look at in this recipe. It’s not too pretty before it cooks and it’s really not too pretty after it cooks. But trust me, it is delicious. It’s also super easy to double this recipe with practically no extra work. Leftovers are a wonderful thing.
- Cut your biscuits into sections. I find cutting them into 6 sections each works best for me.
- Dump the other ingredients into your crockpot and stir.
- Place the biscuit sections on top of the other ingredients. Gently stir them in.
- Cook on low for 4-6 hours. If you are home during cooking time, it is great if you can check about halfway through and gently stir. Don't worry if you can't though, it will still turn out great.
- Dish up and enjoy!
Notes
A great addition to this dish is corn. I use frozen corn and add it to the dish about 30 minutes before the end of the cooking time.
The Mom Behind The Computer http://www.mombehindthecomputer.com/
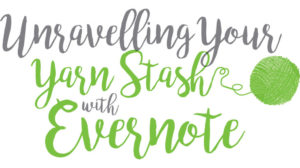
Any fiber arts lover knows the call of the yarn aisle. Given that it’s nearly impossible to pass up those beautiful skeins, it’s important to find a way to know just what you have in your stash! In this class you will learn how to quickly inventory your yarn stash with photos and details in Evernote.. for free!
Your yarn stash will be searchable and available to you, no matter where you are thanks to the magic of their mobile app. Never again will you be questioning just what shade and dye lot you needed to complete the project you have on your needles. Not only will you save time (to spend on your next project!), you’ll also save money (to spend growing your stash!). Join this class today and we’ll have your yarn stash organized in no time!
If you’re not familiar, Skillshare is an online learning community with thousands of classes on everything from business to graphic design to fashion – it’s the Netflix of learning. I’ve learned a lot from the courses I’ve joined on Skillshare and I’m excited to become a teacher there.
By using my special link below not only will you be able to enroll in my class, but you’ll also gain access to all other classes on Skillshare for just 99 cents! For three months, you can join any classes that you are interested in, all for less than a dollar.
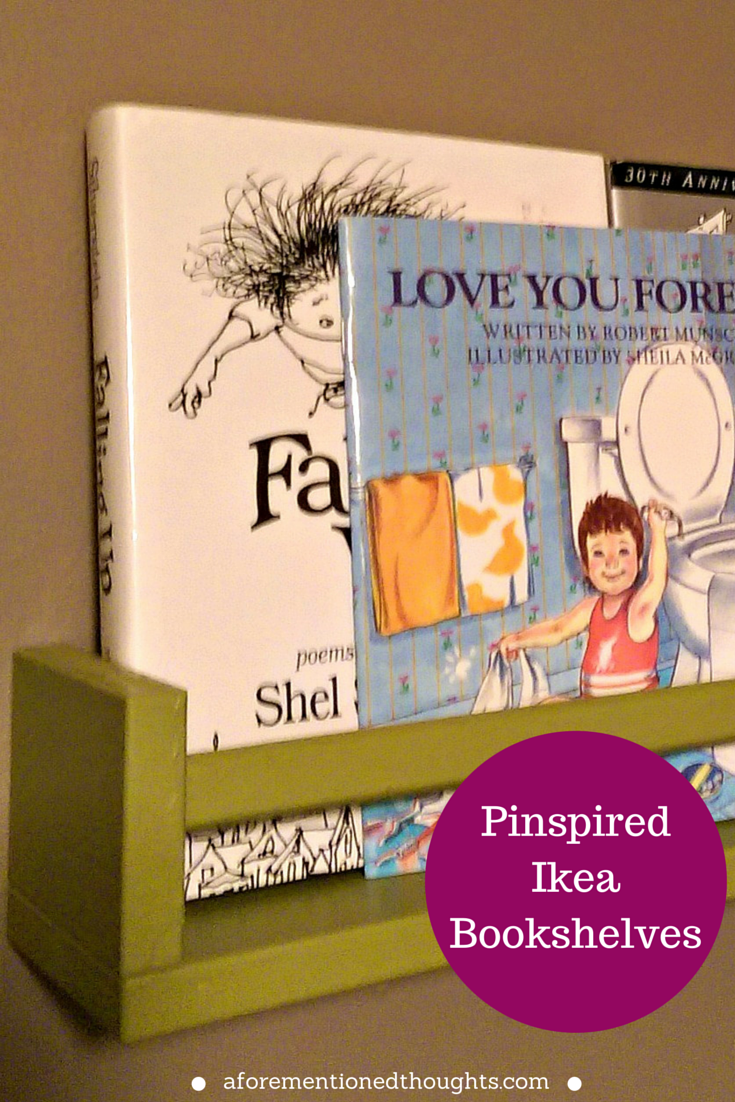
I’ve always been a huge reader (thanks Dad and Mom for reading to me so much as kid and supplying my book habit!) and I feel like my love of reading helped me in so many ways throughout my life. It’s important to me that books an essential part of Little One’s upbringing and I want to make sure she always has books at her fingertips (or at Mommy and Daddy’s fingertips until she’s old enough to enjoy them on her own). Our small rooms don’t accommodate large bookshelves easily, so when I saw this pin, I thought it was a brilliant idea!
Project Time: 1 hour or so Project Cost: approx $5/shelf Pin it or forget it? Pin it!
One of Little One’s aunties (who also purchased the spice racks for us on an Ikea trip) redid my former dresser and chest as her baby shower gift, so we didn’t want to mount the bookshelves directly to the beautiful piece. We decided to make a corner of her room for her books, near the glider where we will likely sit and read to her.
We found some great little paint samples at Lowe’s and picked one up in a bright green to compliment her room colors. I can’t take an credit for the implementation of this project, Hubby did it all from painting, putting them together, and mounting them to the wall. We did have issues mounting them to the wall due to the type of hanging areas on the back of the spice rack, but otherwise I’m really happy with how they turned out! The hold her books well and add a nice little pop of color to the corner area. There’s no way we would have had room for a bookcase right now, so this was a wonderful solution.